How to create an NFT collection on Ethereum using NFT-Inator
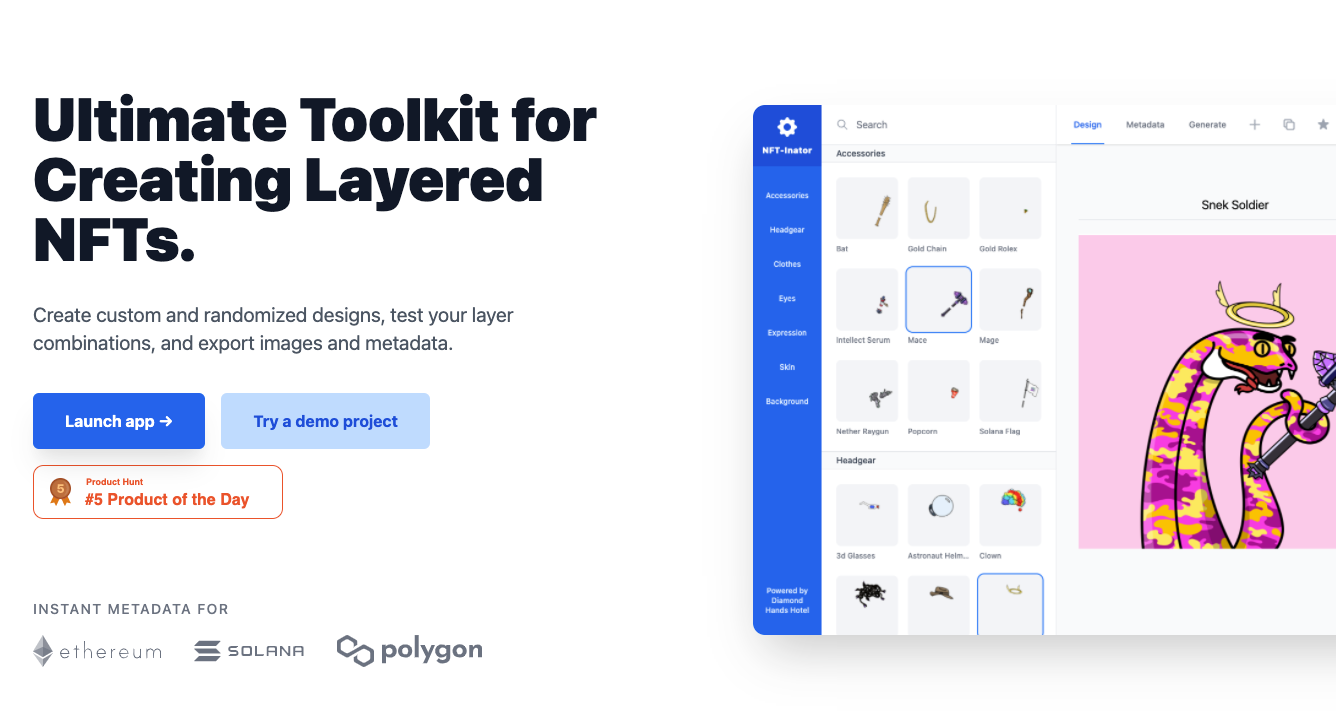
Create NFT collections with NFT-inator: Our first open source tool designed to help artists create custom and random designs, test layer combinations, set the rarities for each layer, and export images and layer metadata for each token
There's an insane amount of hype surrounding NFTs - with huge multi-million dollar projects such as Bored Ape Yacht Club, Crypto Punks, Azuki, Mekaverse and so many more out there. The worlds leading brands are striving to be a part of the web3 movement and for good reason. Web3 offers some major advantages over web2, and NFTs are at the forefront of the revolution.
At the Diamond Hands Hotel, we're focused on helping artists and projects enter the NFT space using our completely free tools, the first of which is NFT-inator.
To keep this article short and sweet, we’re going to assume the following:
- NFT knowledge: You already know what an NFT is and have an idea of how web3 technology works. (If you don't, check out this article)
- Design: You are looking to create a custom NFT collection using your own artwork/ideas and have prepared the layers for generation.
Generative vs non-generative art
Two main types of art dominate the NFT space, generative and non-generative. With generative art, many image layers (traits) are stacked together to create many unique pieces, that are often tied to various utilities for holders.
Generative art usually comes with some caveats - for example, you would usually need a developer to generate the final images, which is where NFT-inator comes in to ease the process.
NFT-inator: A free toolkit for creating generative NFT collections
When we created the Space Sneks NFT collection, our artists spent countless hours in Photoshop testing layer combinations. We realised other projects and artists were having the same issues, so we had our development team create a tool to speed up the process and immediately opened it up to everyone, completely FREE.
Enter NFT-inator: Our first open source tool designed to help artists create custom and random designs, test layer combinations, set the rarities for each layer, and export images and layer metadata for each token. For more information check out how NFT-inator got 25k visits in just 4 weeks.
Creating Your NFT Collection with NFT-Inator
Before visiting NFT-inator.com please make sure the you have prepared the following:
- Completed artwork split into layers, and in folders for your trait categories
- You know which blockchain you plan to launch on
- You are aware that you will need a smart contract (more details later)
In this guide we're going to create a collection of 500 pieces on the Ethereum blockchain and show you the features of the NFT-inator toolkit.
Step 1: Importing your images 🏞
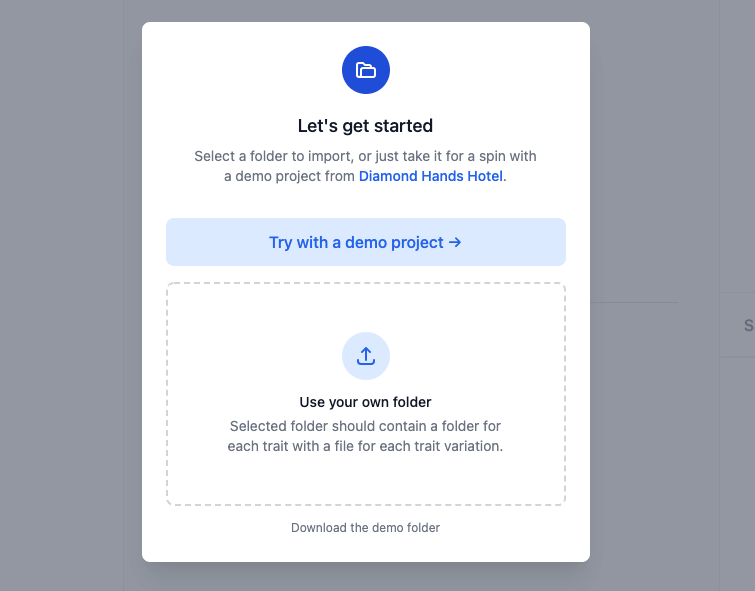
Head to NFT-inator.com and click the "Launch app" button. You will be greeted by a window that asks if you'd like to check out the demo project or upload your own. We recommend checking out the demo project first to get familiar with the interface before adding your own collection.
Uploading your own images
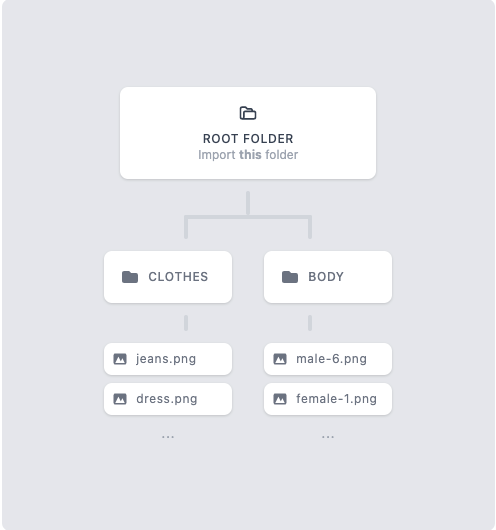
Your images should each be inside a trait folder (i.e Clothes, body) which should be inside your root folder, as shown in the diagram below.
Click use your own folder, and select the root folder to be uploaded. Then wait until the thumbnails have been generated.
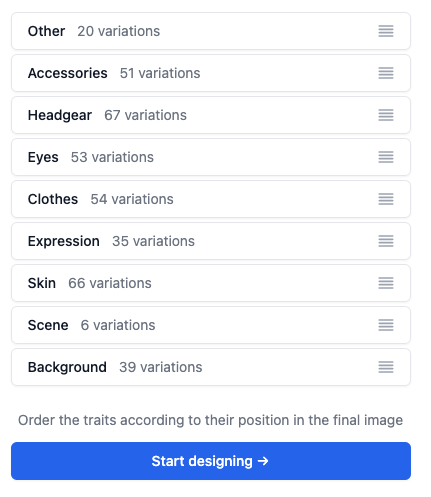
Choosing the layer order
Your images will be stacked on top of each other to create the final pieces in your collection. You will now need to choose which order they will appear in. Use the handles to drag your layers into the correct order and then click start designing.
Step 2: Creating individual tokens and testing layers 🎨
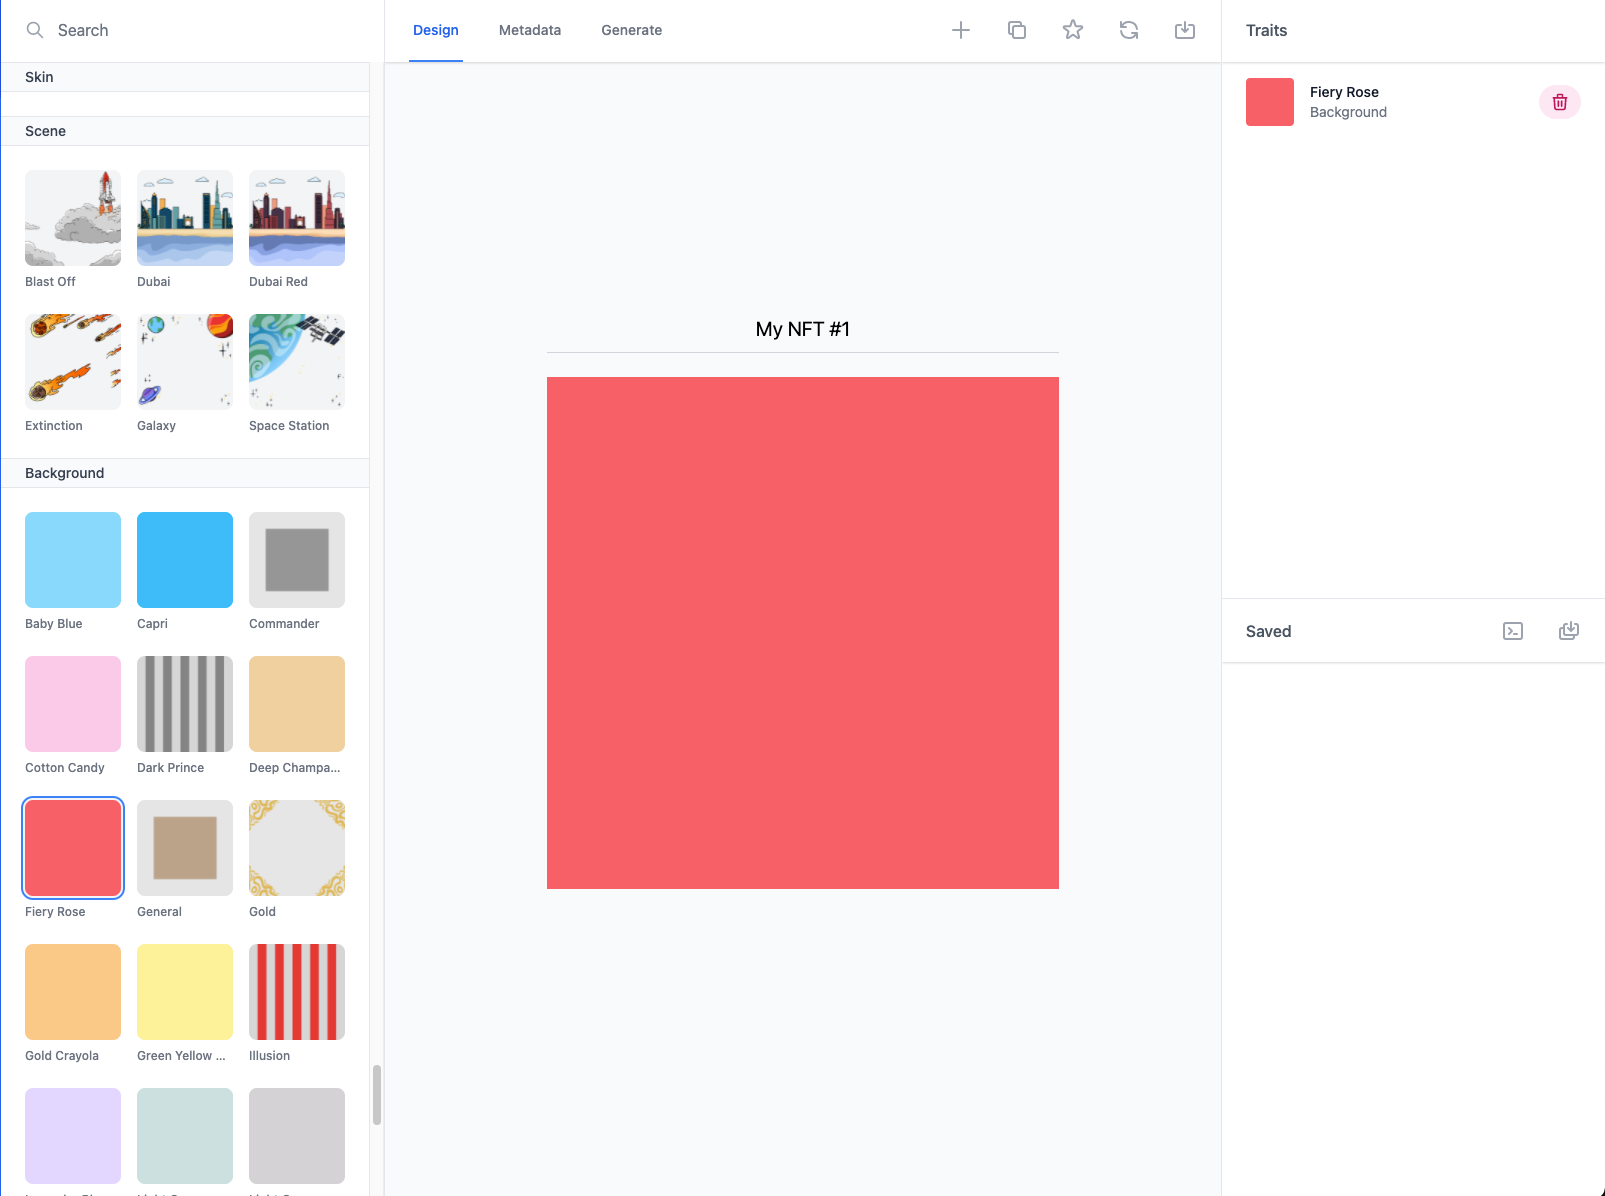
Once your images are uploaded you will be greeted with the above interface. This is the first of 3 stages on the app called 'Design' and it's here that you are able to not only test that your layers fit together, but also create completely custom 1of1 pieces that can be added to your final collection generation in the next steps.
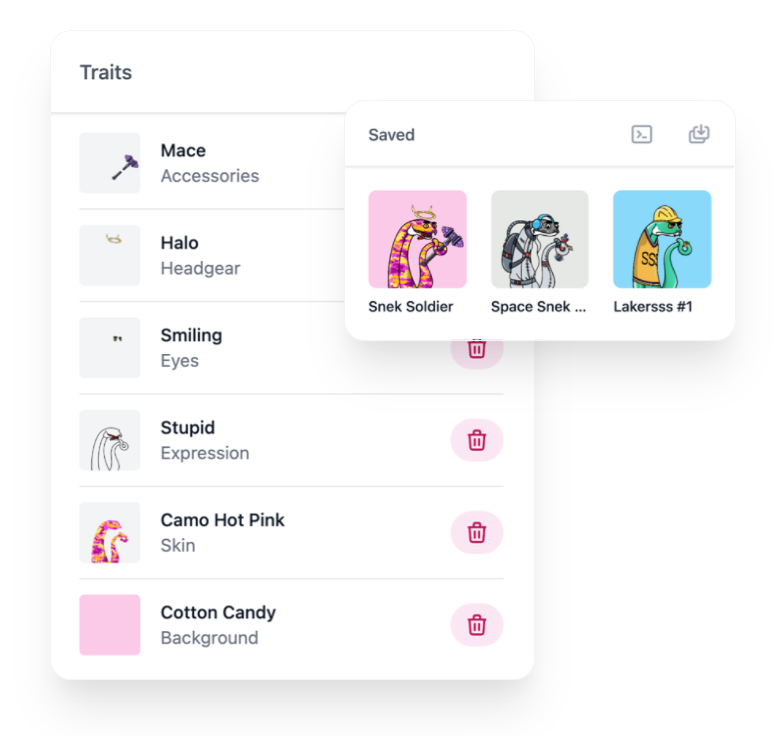
Each trait will be displayed on the left. By clicking one of the thumbnails you can add that image to the current piece in the centre of the screen. If you make a mistake or no longer want a layer to be included in the final design, click the bin icon for that layer in the top right or select another image for that layer to replace the current.
Once you've added all of your image layers for that chosen NFT, click the star icon at the top to save that token.

Note: Saved tokens can be edited at any time by clicking the thumbnail in the bottom right and changing your layer.
When you are ready to create your next token, click the plus icon at the top or the duplicate button to create a copy that can be edited.
To delete a token, click on it in the bottom right, followed by the star icon again to un-save it.
Using the shuffle feature
Using the above example, let's say you want to have 3 pieces that all have the top hat and rainbow sword trait. Even with duplicating and changing layers this can be time consuming. We added a shuffle feature that allows you to keep certain layers and randomise others.
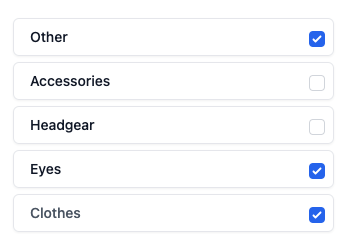
To shuffle, first duplicate your layer, then click the rotating arrows icon at the top. Check the boxes for traits you want to shuffle, and click shuffle.
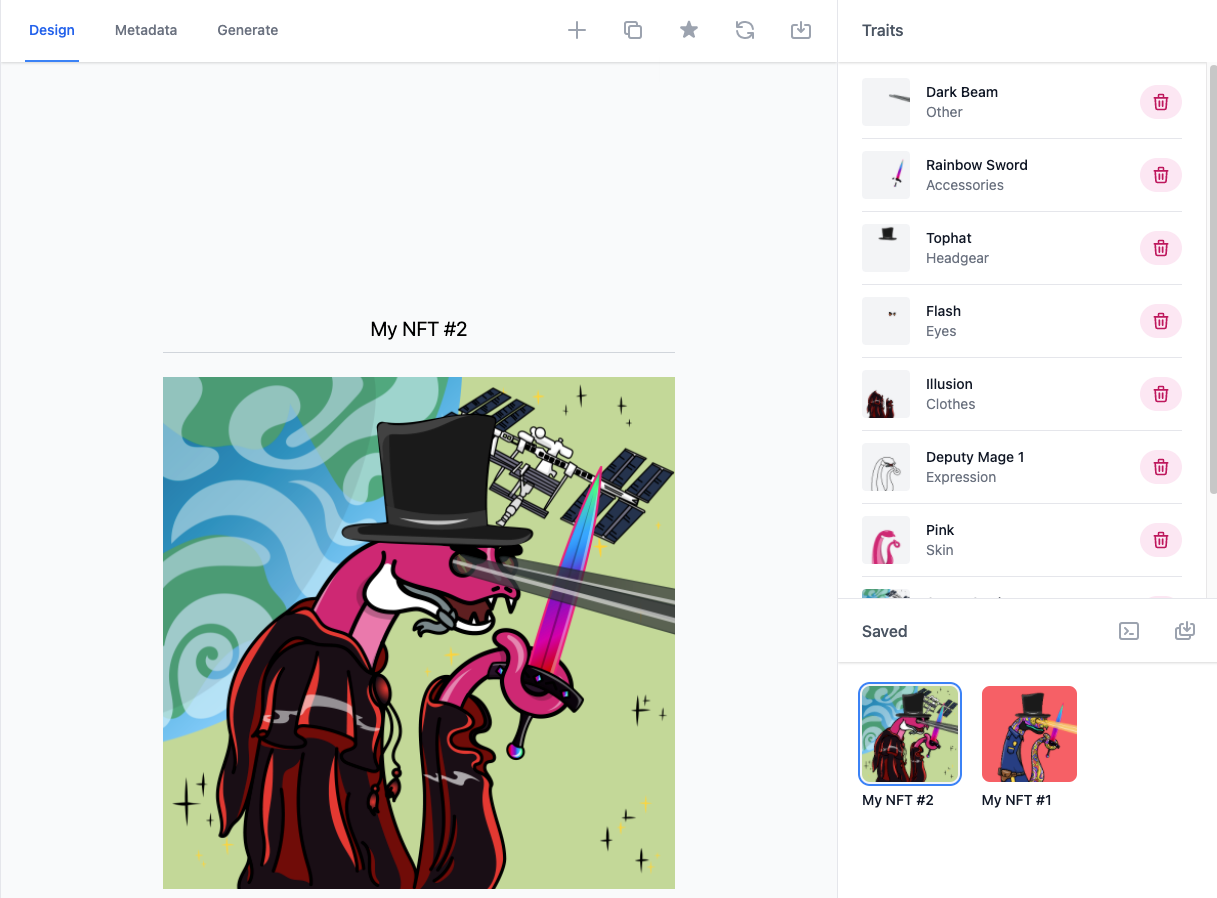
In the bottom right you can click the icons next to 'saved' to download individual tokens, or the token + JSON metadata for the individual ones you have created.
The left hand icon generates a metadata file downloads a file with the layers for each token in case you want to use your own script to combine them or do some post processing. The right icon exports the combined images and metadata for saved tokens.
Now that you know how to create tokens one by one and test layers, create any individual tokens you would like in your final collection, then we can move onto the next step.
Step 3: Setting up your metadata 👨💻
The next step is setting up the metadata for your collection that is exported at the end. This contains all the details of your collection and is extremely important to get correct. It can be edited after the download, but you will have to edit it in every file. Once you deploy it with a contract, you will not be able to change anything.
Click the metadata tab next to design - it's here where we will set everything up.
Basic Settings
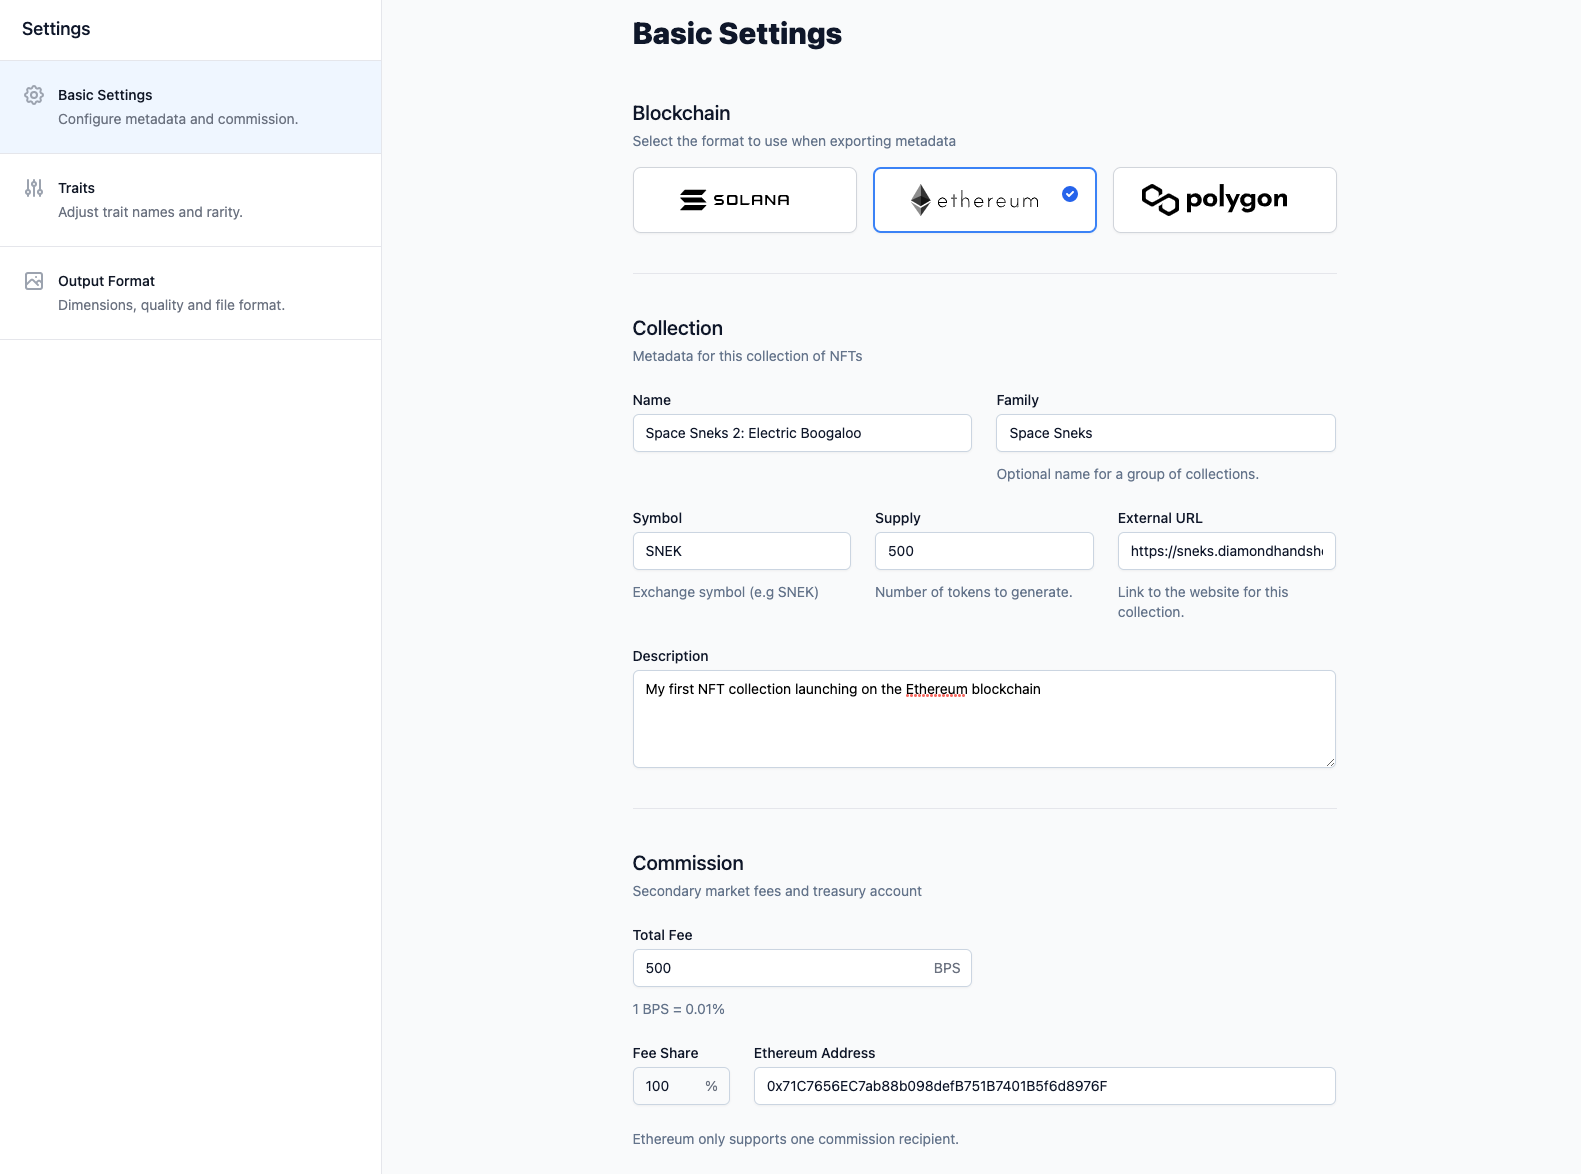
Here you will have to enter the following details:
- The blockchain that you plan to launch on
- The name and family name of your collection
- Symbol - Usually a few characters that identify your collection (must be unique)
- Supply - The amount of tokens you want to generate
- External URL - your drop page website link
- Description - A brief description of your collection that will be displayed publicly
Commission
Commission is the last part of the setup. Your commission decides how much you as the creator will earn on the resales of your tokens on secondary marketplaces.
Choose the percentage in BPS that you want to take (1000 BPS is 10%), we recommend taking between 5-7.5%. Then paste your Ethereum address into the field.
Ethereum & Polygon - commission settings in token metadata is a non-standard field, and only supported by some marketplaces. To ensure you receive the commission, your smart contract must also implement EIP-2981.
Solana only - If you want to share the commission with multiple wallets simply click the add a creator button and enter another address.
Step 4: Traits and rarities 🎩
Once you're happy with the basic settings, it's time to set up the different traits and layers so that they each appear the amount of times you'd like in the collection.
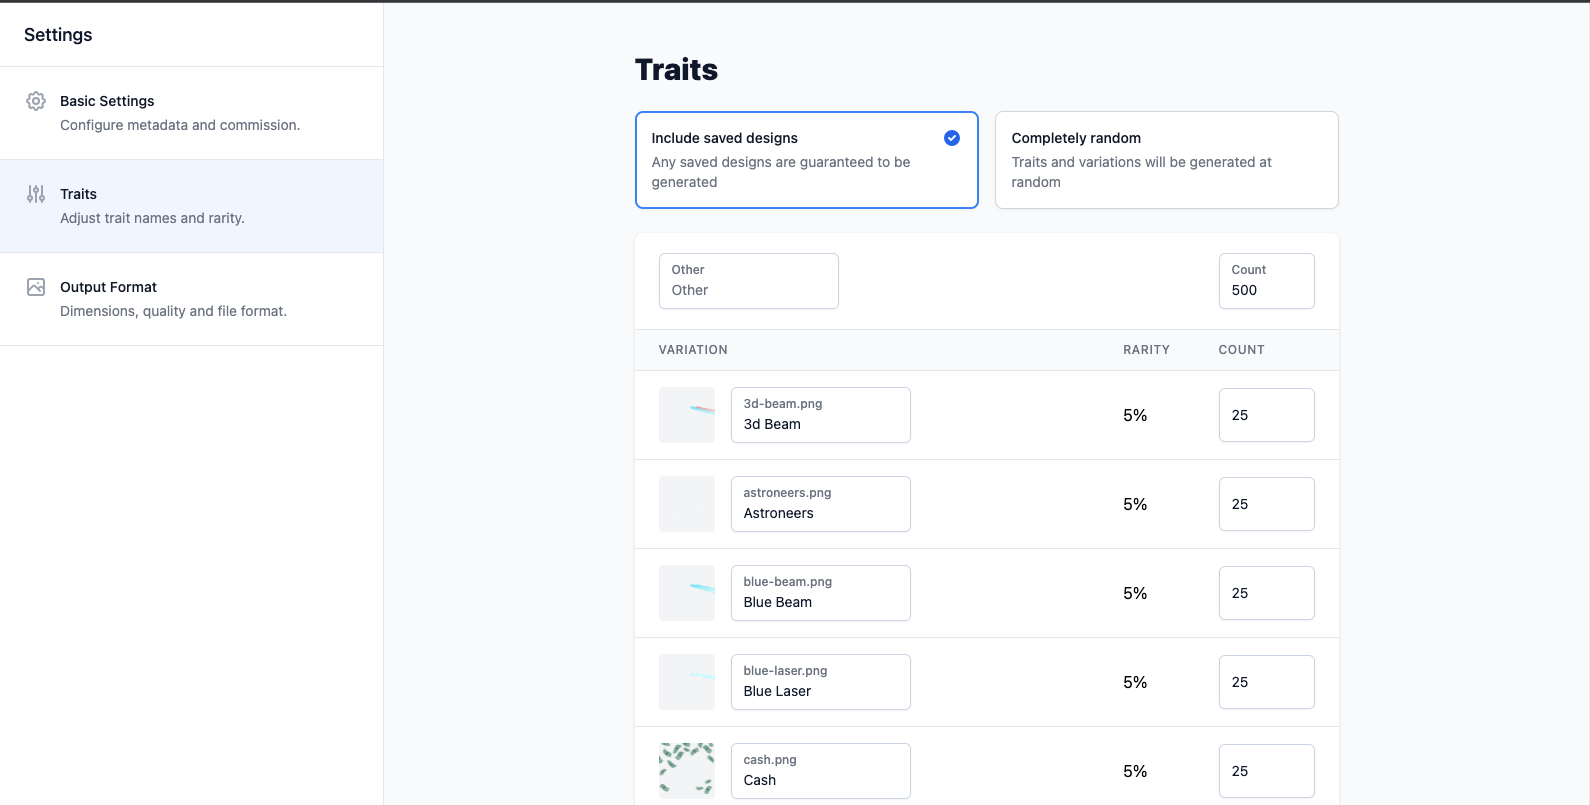
At the top you can choose to include saved designs (that we made earlier 1 by 1) or create a completely random generated collection.
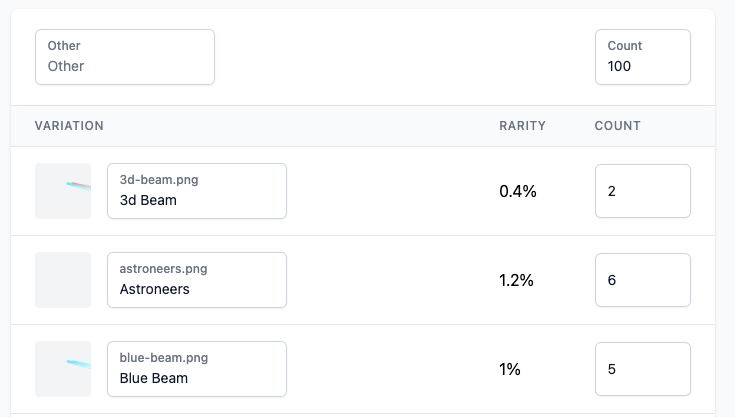
The interface here shows the following:
- Trait categories are grouped (i.e other, clothes, headgear)
- Variation - the individual trait
- Rarity - the frequency that the trait will appear in the collection
- Count - the amount of times that trait appears (determines the rarity field)
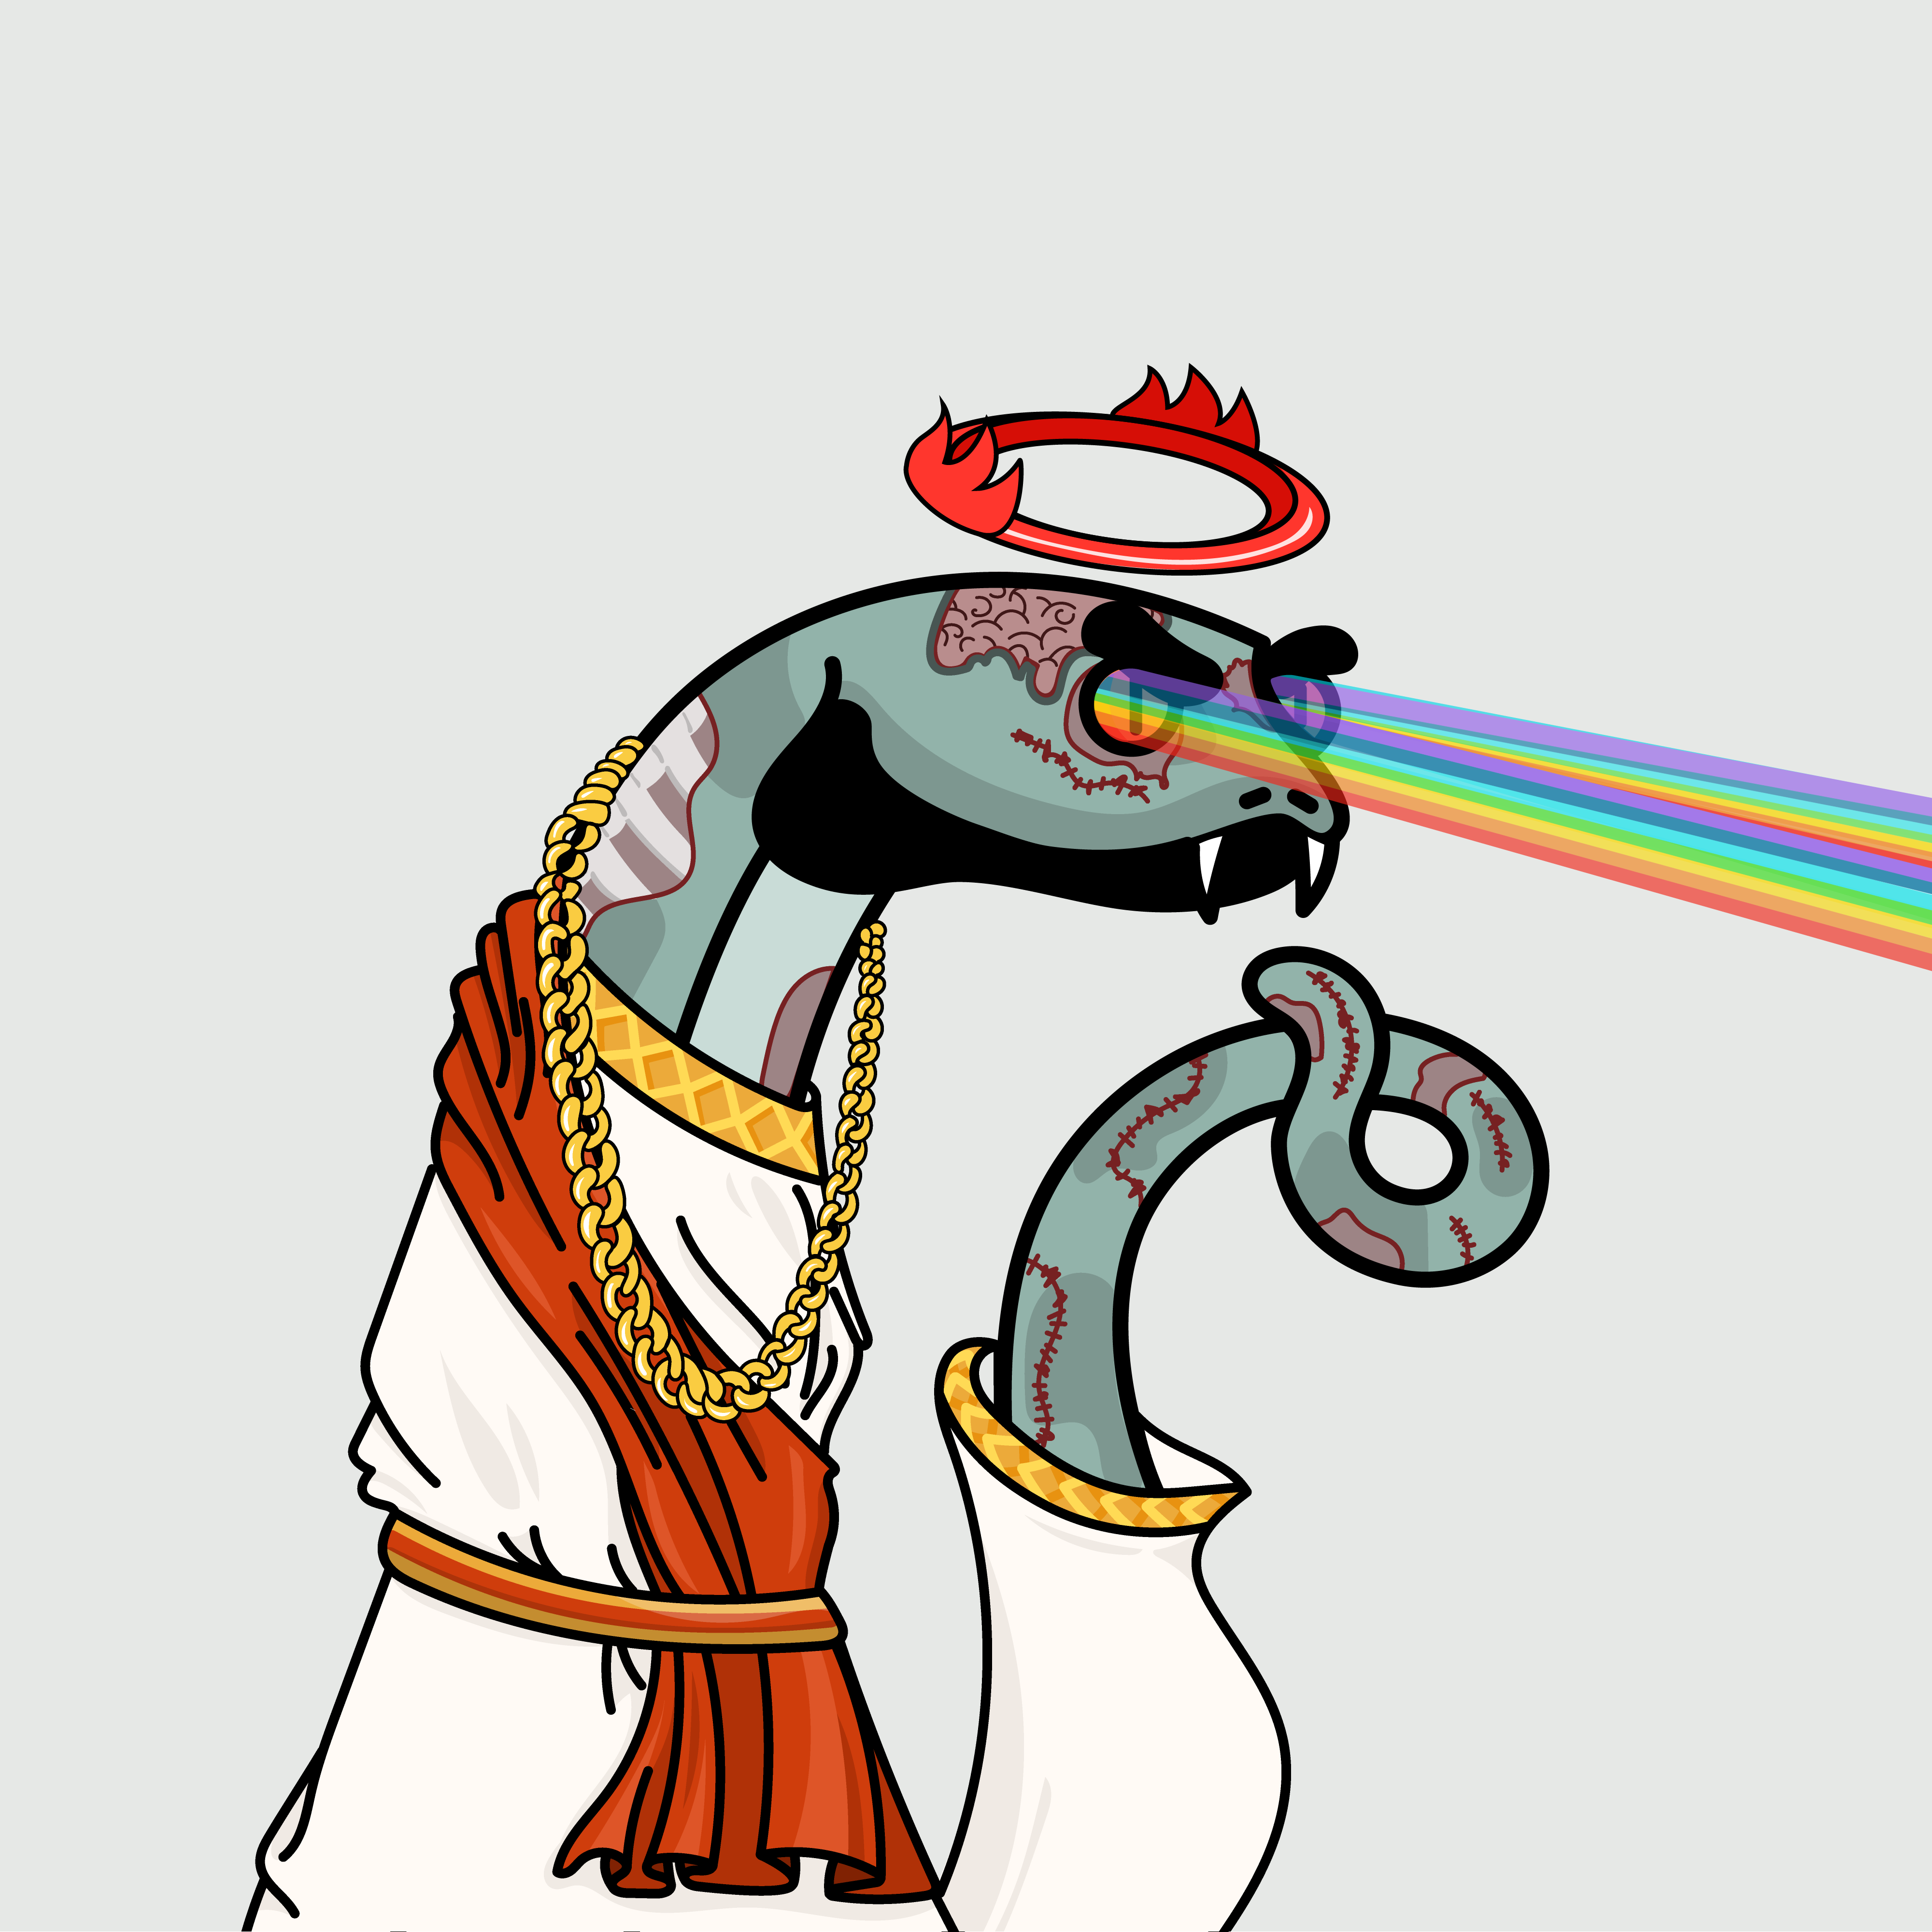
For this example, we only want the 'other' trait to appear on 20% of the entire collection (laser eyes and overlays are rare in our collection)
We also only want 2 x 3D beams and 5x Blue beams so we will update those for the time being. To do this I will set the count to 100 for the category (100/500 = 20%) and then set the beams to the count that I would like them to appear in.
For the sake of this example we will only change these, but in your full run for your collection you will want to go through all the categories and adjust these to your preferences.
Please note: The next step in the metadata steps is output format. This feature is not available yet but when added will enable you to change the resolution and format of your outputted images.
Please note: If you increase your total supply, make sure to update the count for each category and variation as they won't be automatically recalculated.
Step 5: Generate your NFT collection! 🥳
Now for the moment you've been waiting for. Setup is now complete and it's time to generate your entire NFT collection.
When you're ready, click the generate section on the left.
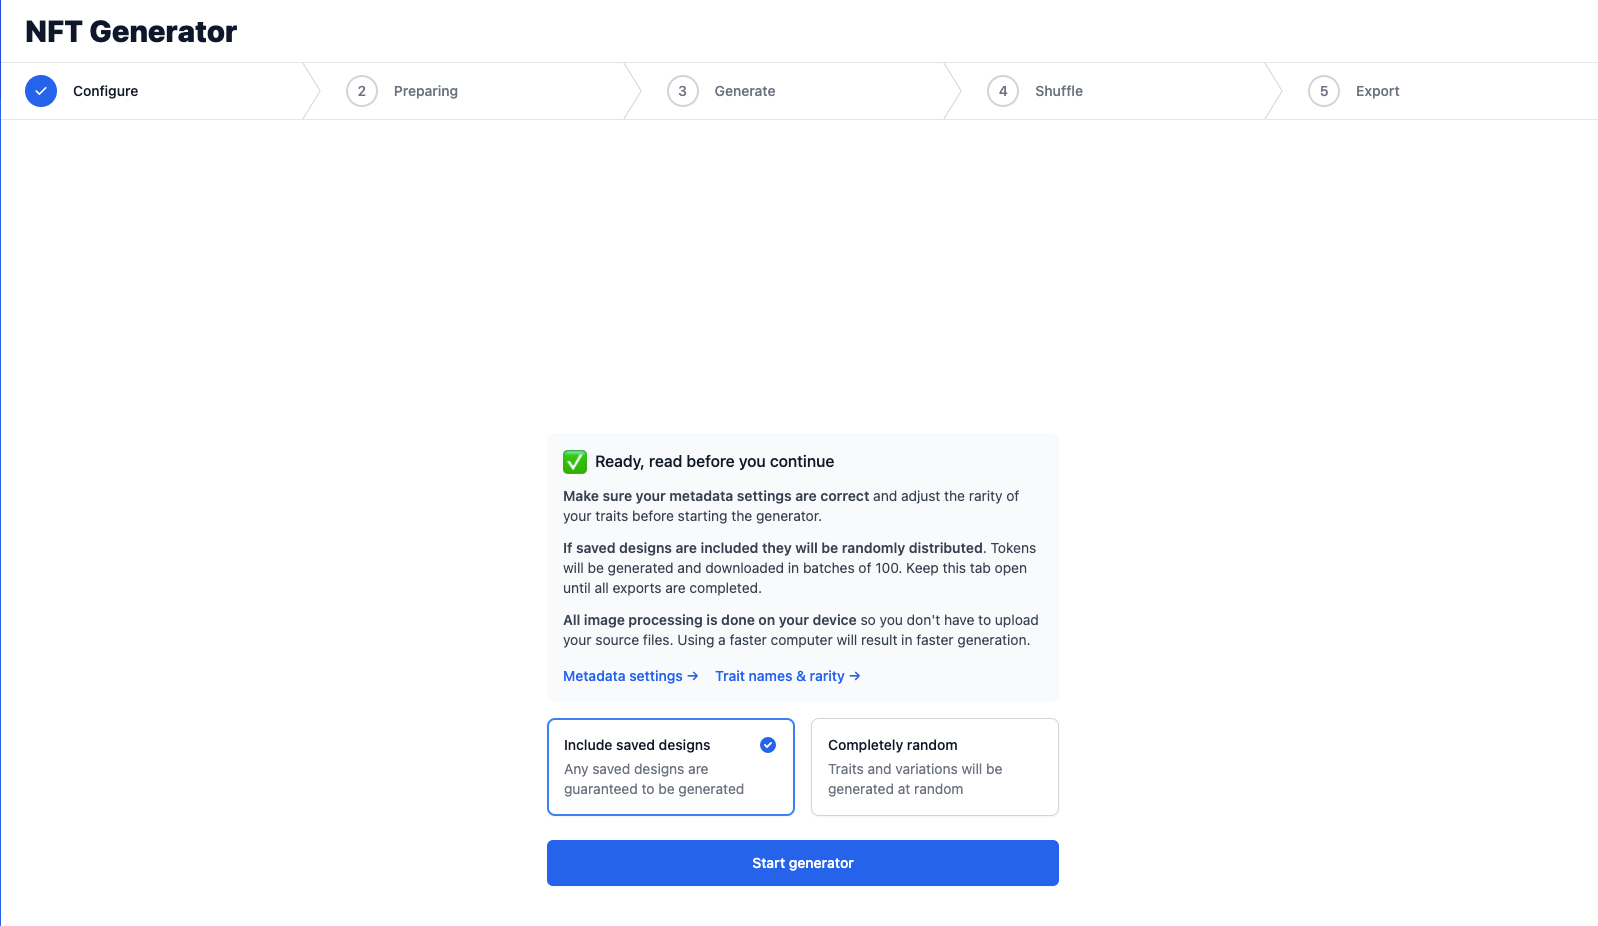
IMPORTANT: At this stage you must make sure that all of your individual tokens have been created, and the rarities of all your traits has been set up.
Select include saved designs if you wish to use those you created earlier, then start the generator.
Step 6: Wait Patiently⌛️
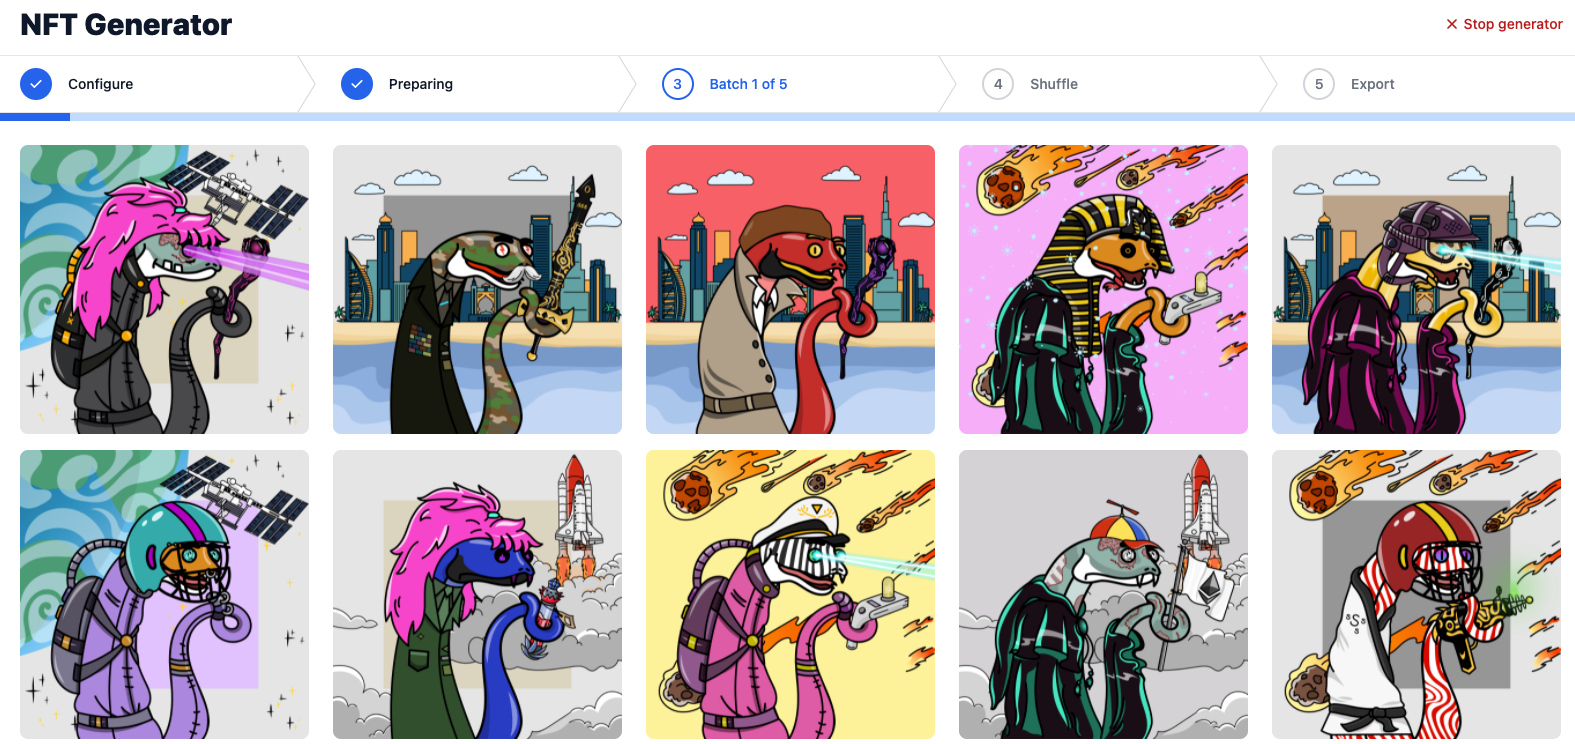
Your NFT collection will now begin generating the full collection by combining the various image layers and generating individual randomised tokens.
This process may take a while depending on the chosen supply, and the power of your computer or laptop.
Do not exit the tab whilst this process in in progress. Also, staying on the NFT-inator tab will speed up the generation process.
Step 7: Shuffle and Export ⬇️
This step happens automatically. Now that your collection has been generated, your tokens will be downloaded in batches in a zip folders. Once downloaded you can unzip these and add them all together.
Step 7: Launching your collection 🚀
To get your collection launched you will need a smart contract. NFT-inator doesn't currently offer a smart contract service yet! But we're looking to add it in the very near future.
We recommend heading to a platform like NiftyKit to create your own smart contract to launch your collection with no code.
If you are looking to create a completely custom contract with minting on your own website, you will need a developer to assist the rest of the process (or check out our blog post on using the OpenSea creatures template to do it yourself).
Step 8: Congratulations! 🎉
Congrats! Your NFT collection is now ready for launch. As this article is about generating your collection we won't get into promotion and launch strategies, but there's loads of other blogs and articles to help you here.
Still Need Assistance? 🙋
If you need help with any part of NFT-inator you can speak to a member of the team on our Discord server.
Join here - https://discord.gg/dhh
If you enjoyed using NFT-inator and are looking to join an awesome community, consider picking up a Space Snek from Magic Eden:
https://magiceden.io/marketplace/space_sneks_society